本文最后更新于:2023年11月9日 晚上
如何发送手机短信验证码
阿里云短信业务实战教程
手机短信验证码接口适用于触发类的应用,如用户获取验证码、手机找回密码、手机短信订单通知等;具体表现为由用户的某一个事件或操作所触发的短信。最主要的作用就是确定每一个操作都是用户本人自己触发的。*(发送手机验证码有很多个平台,本次测试使用阿里云)*
除了手机短信验证码,对邮件发送感兴趣的朋友可以看我另一篇博客:SpringBoot实现发送邮件(验证码,文本,附件)
1.阿里云平台的使用
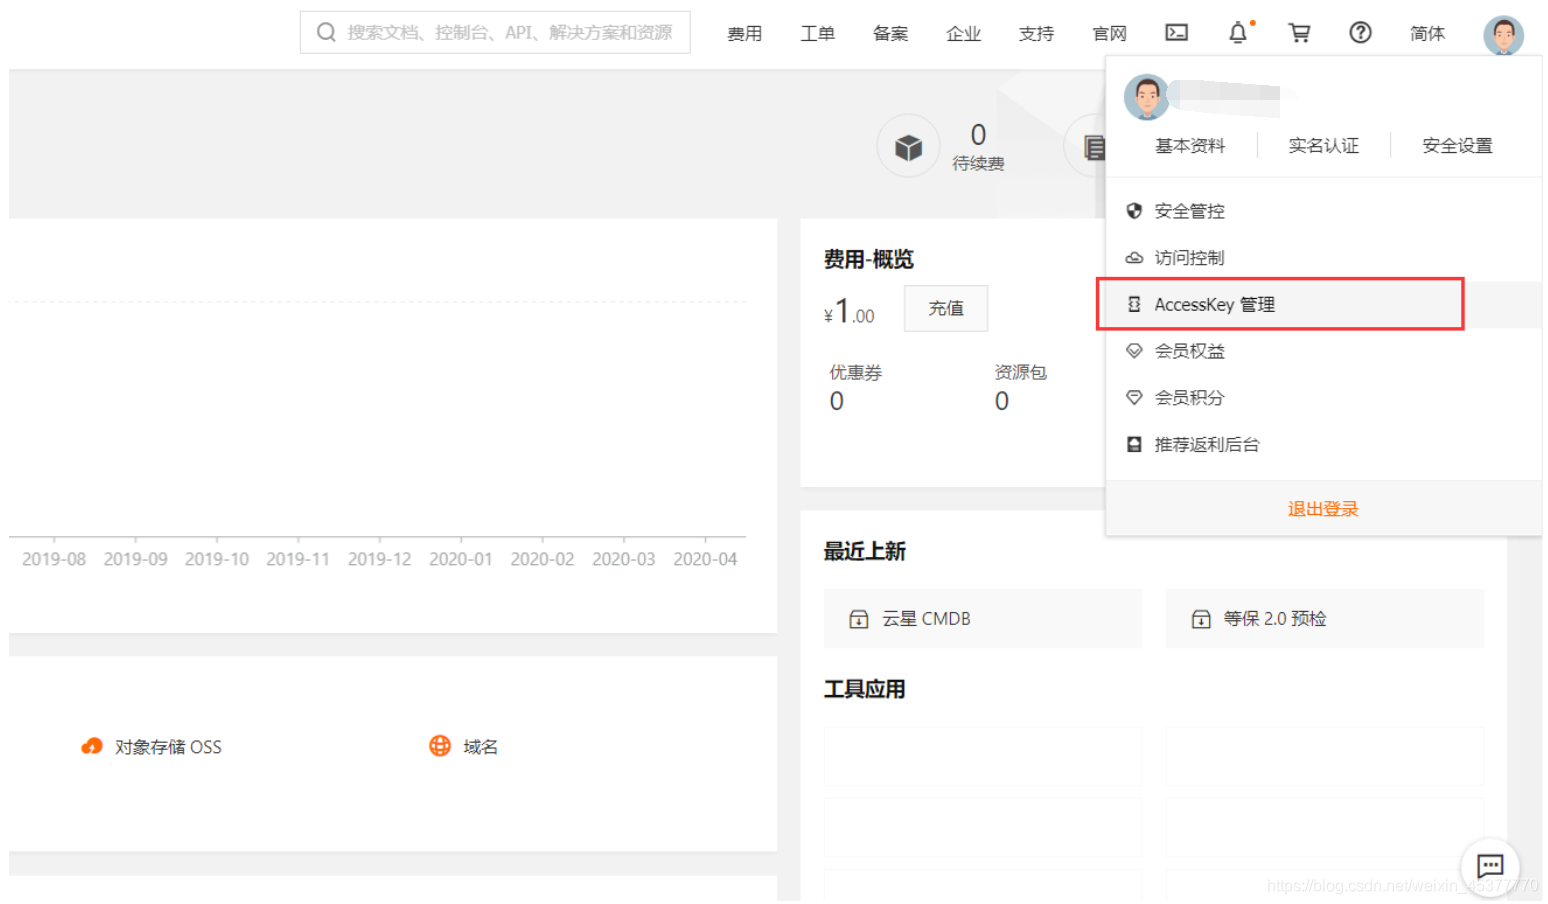
登陆阿里云网站,进入控制台(支付宝,淘宝都可以登陆需要实名认证)

点击用户头像,选择AccessKey管理
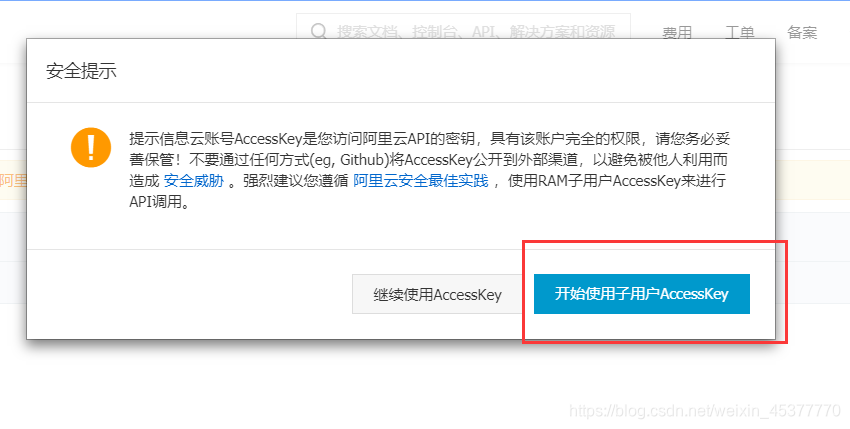
选择开始使用子用户AccessKey
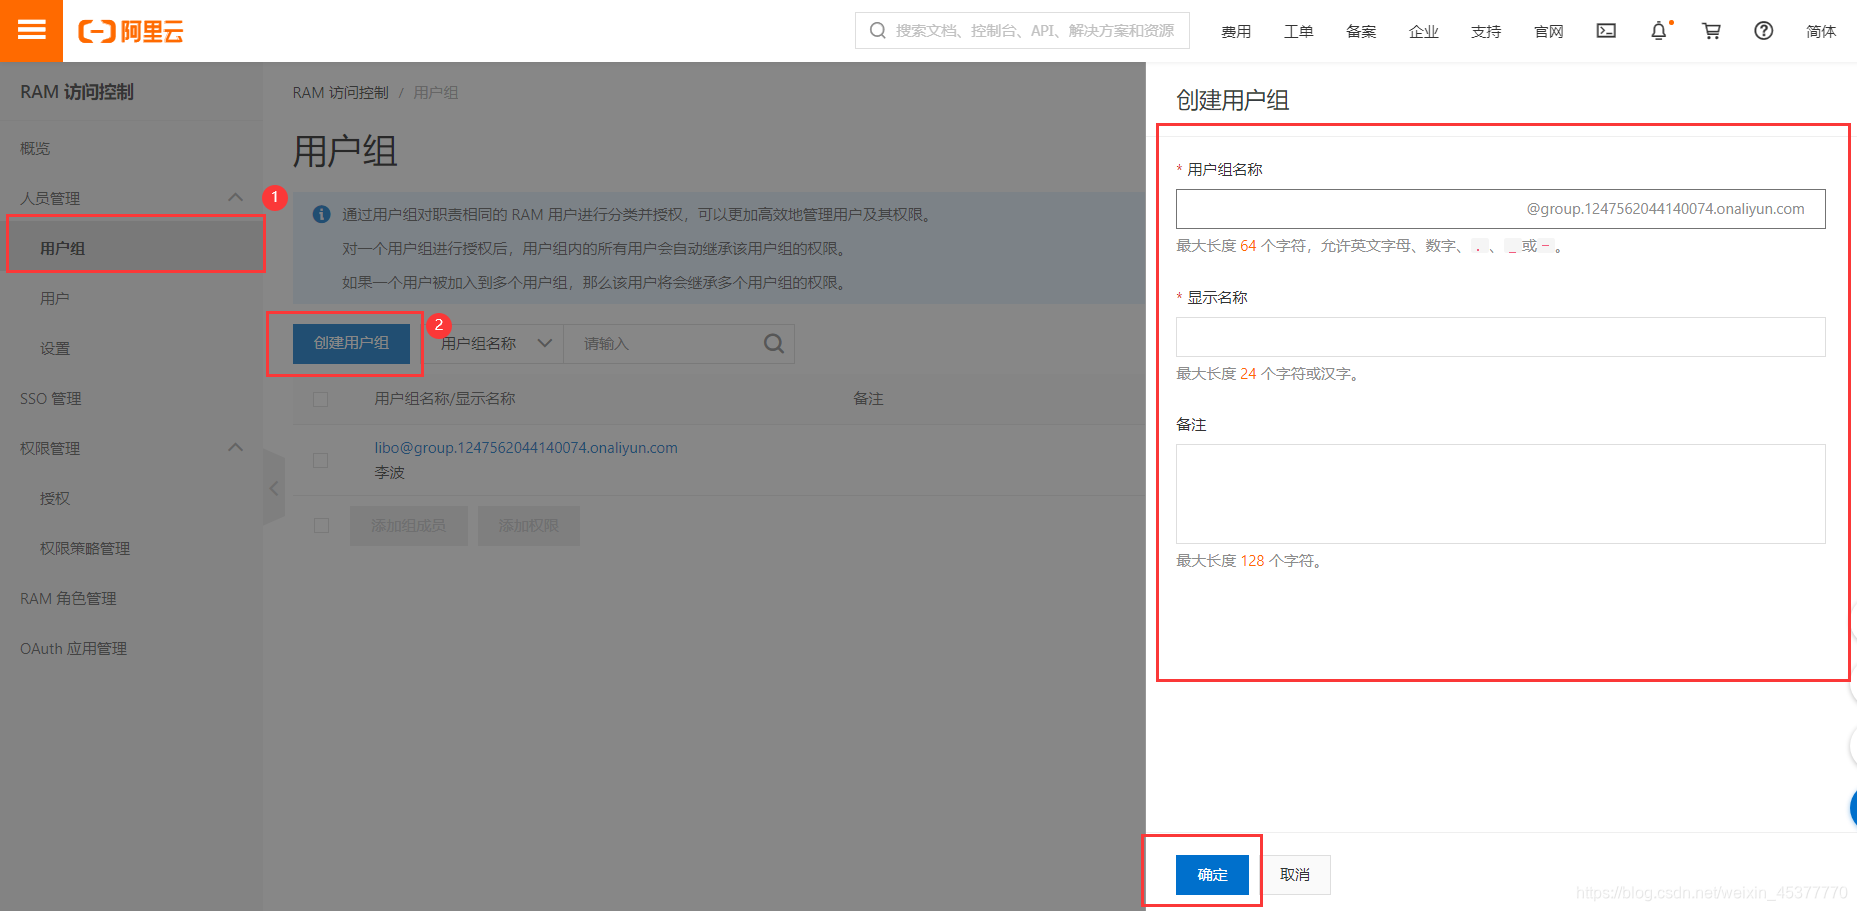
2.创建用户组及用户并添加权限
创建用户组
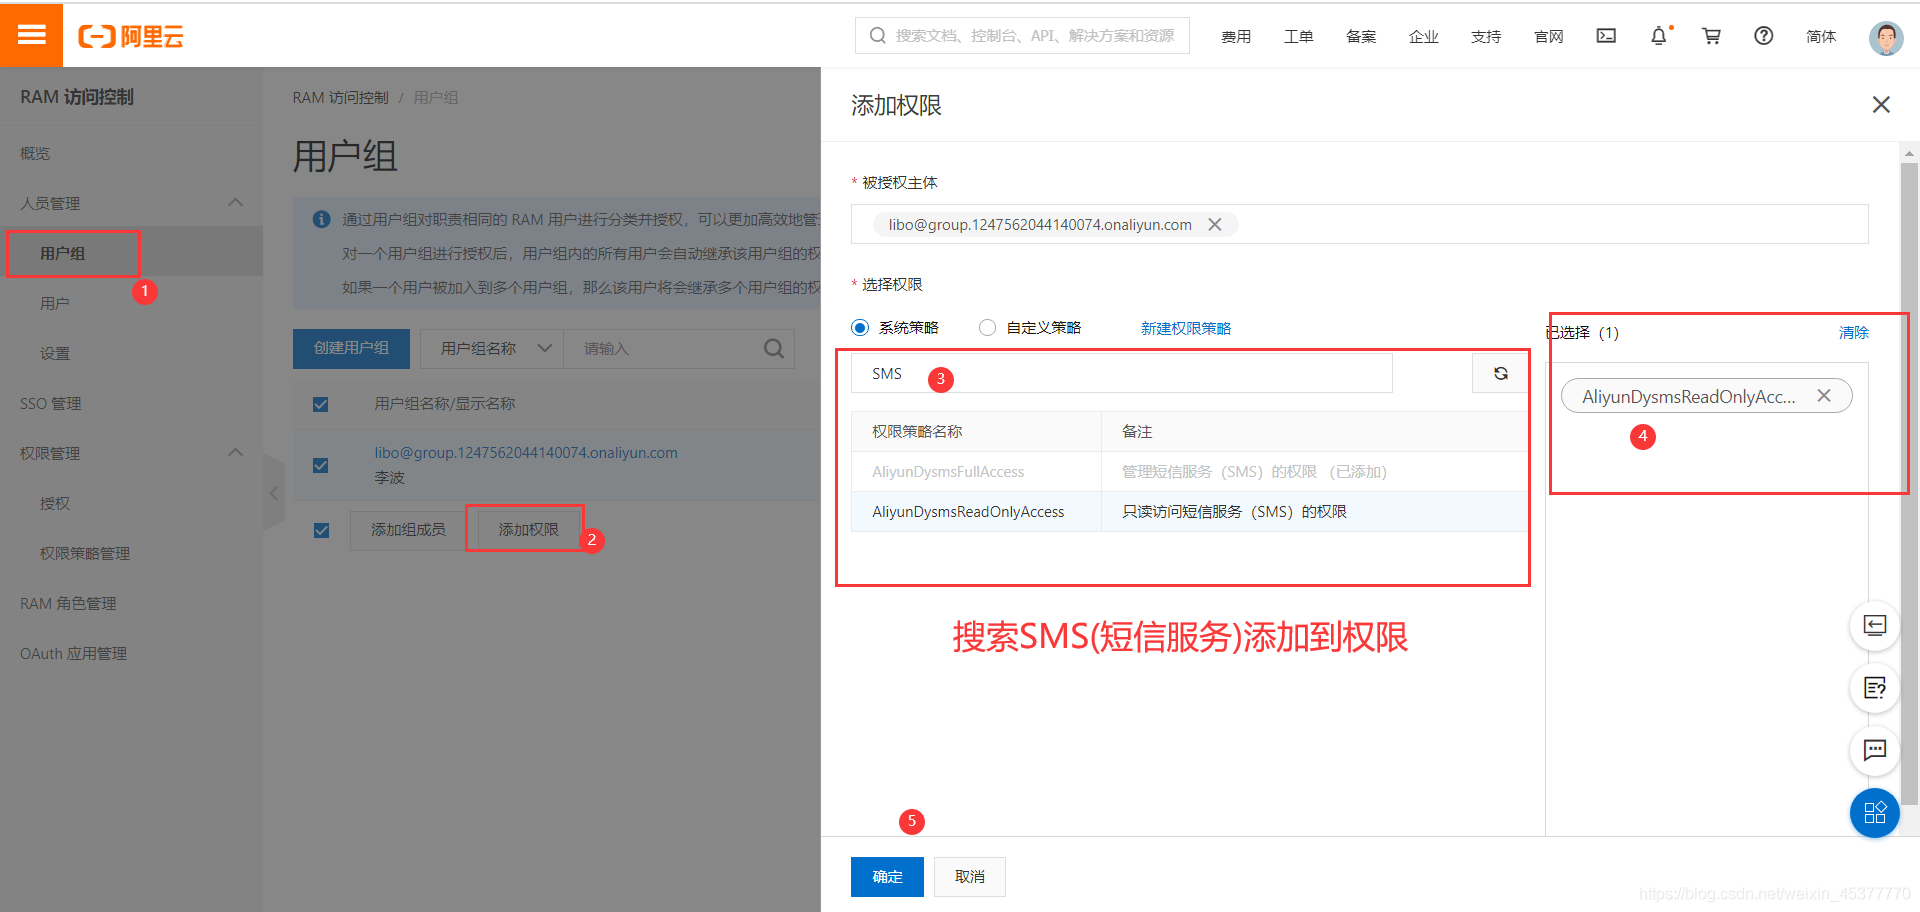
添加短信服务的权限SMS(代表用户组下的所有用户都有此权限)
创建用户(注:这里一定要开启编程访问)
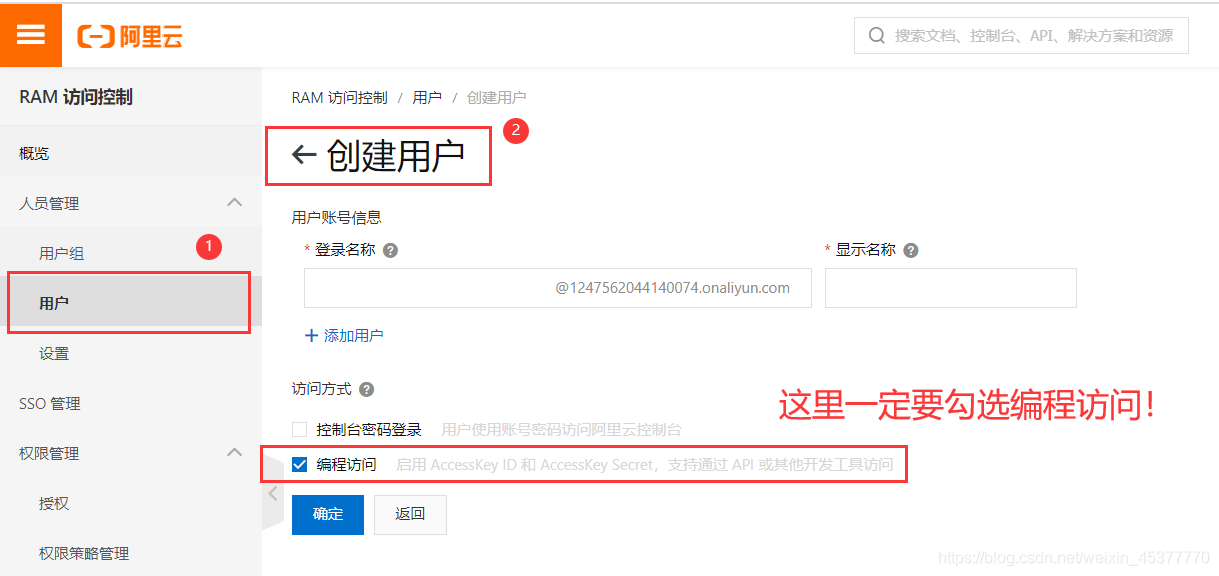
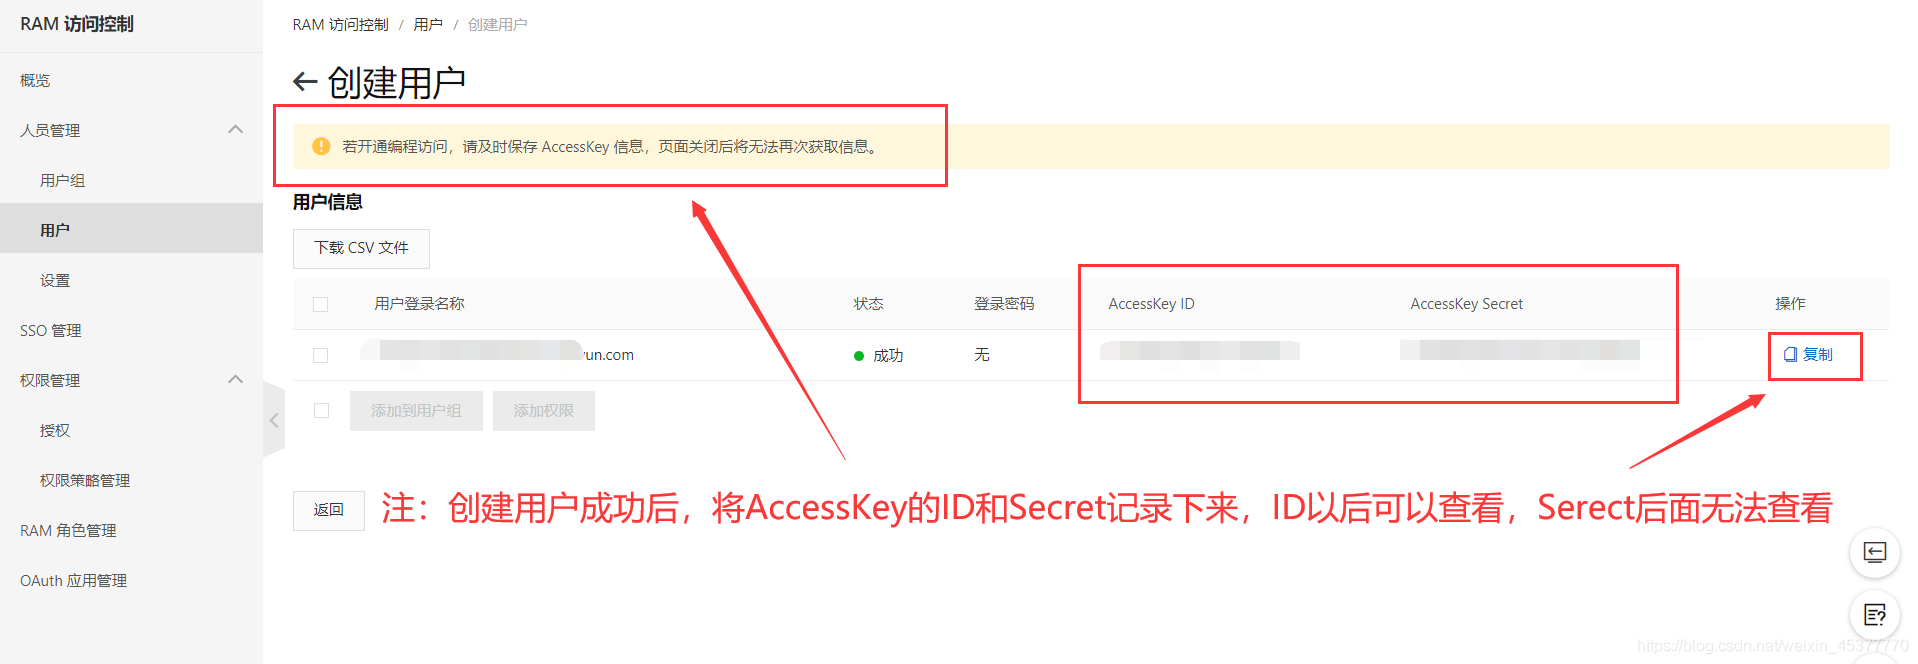
创建用户后,要把AccessKey ID和AccessKey Secret着两个值保存下来(可以直接点复制)
在后面的编程中会使用到着两个值
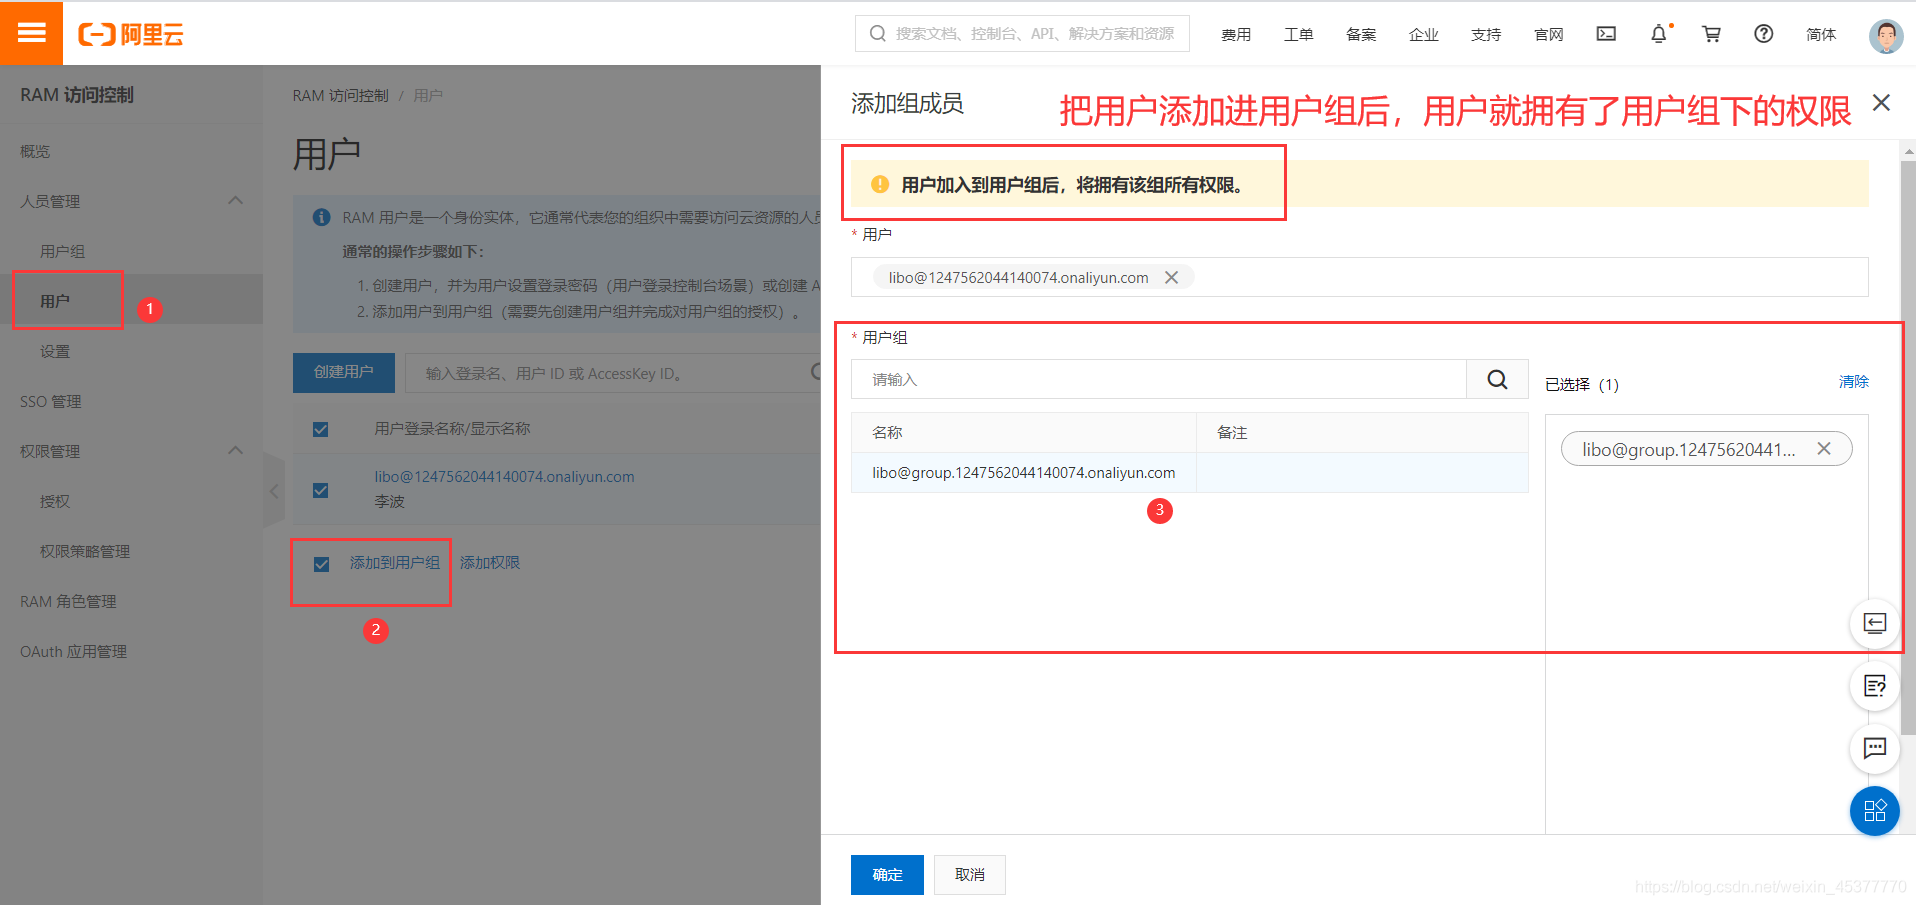
将用户添加到用户组下
3.添加短信签名和短信模板并充值费用
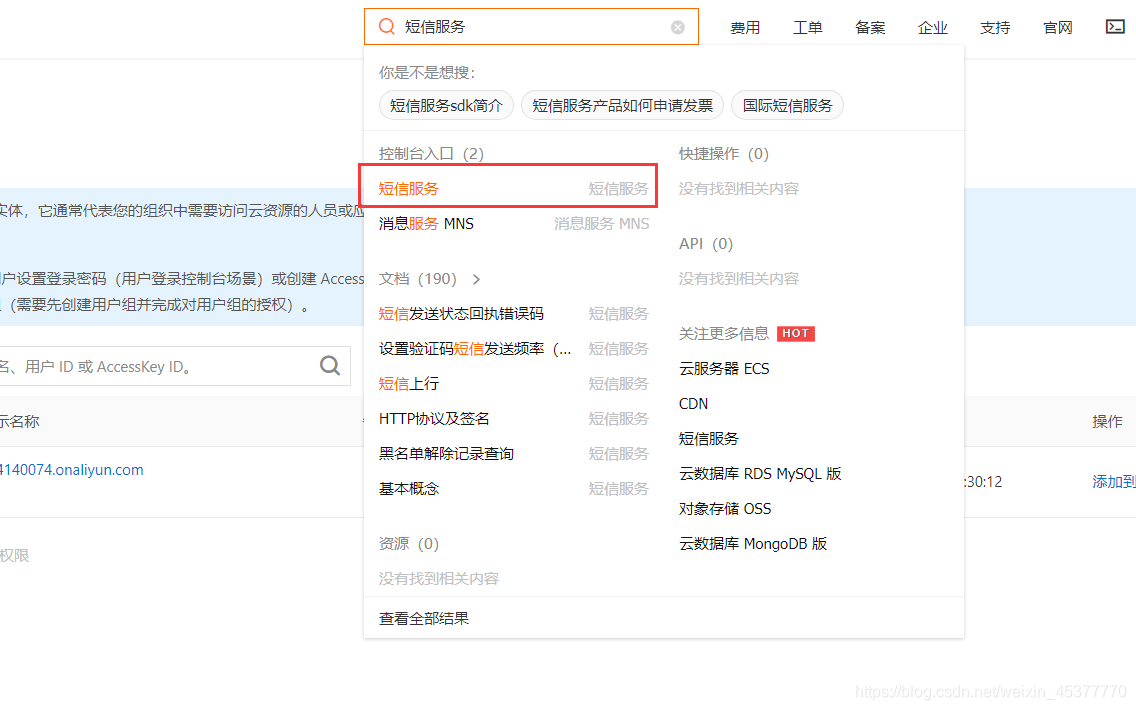
搜索短信服务
来到短信服务页面之后,可以看看快速学习或者帮助文档来对阿里云短信服务做具体了解
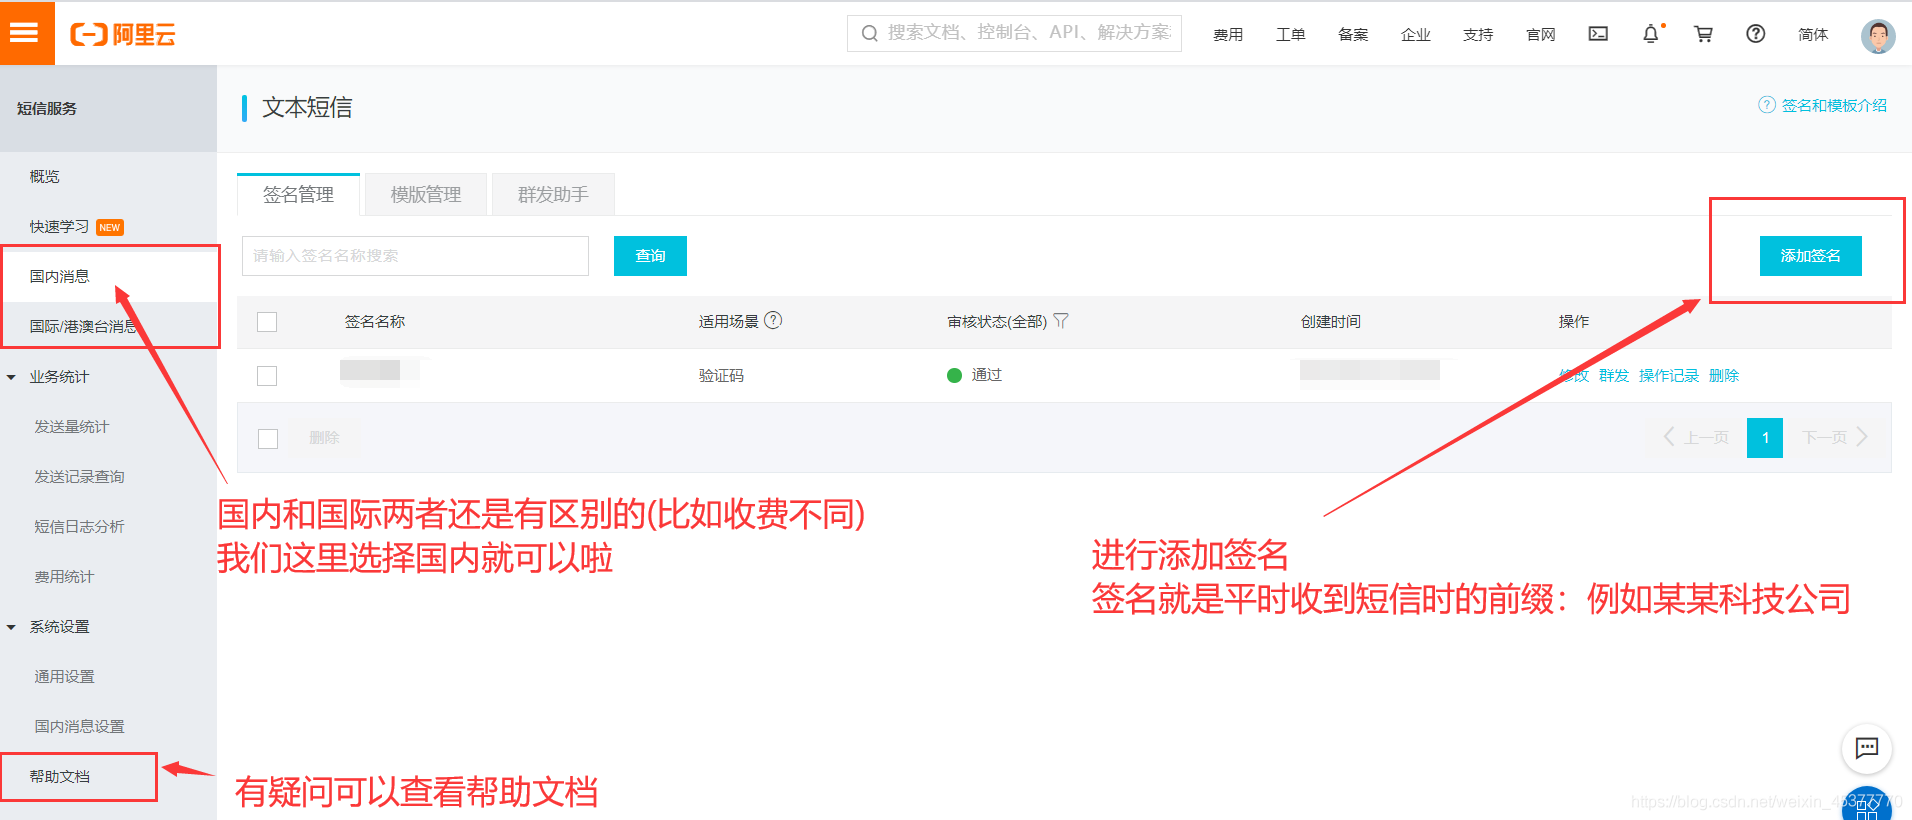
接下来签名管理和模板管理我们都需要进行填写
选择添加签名
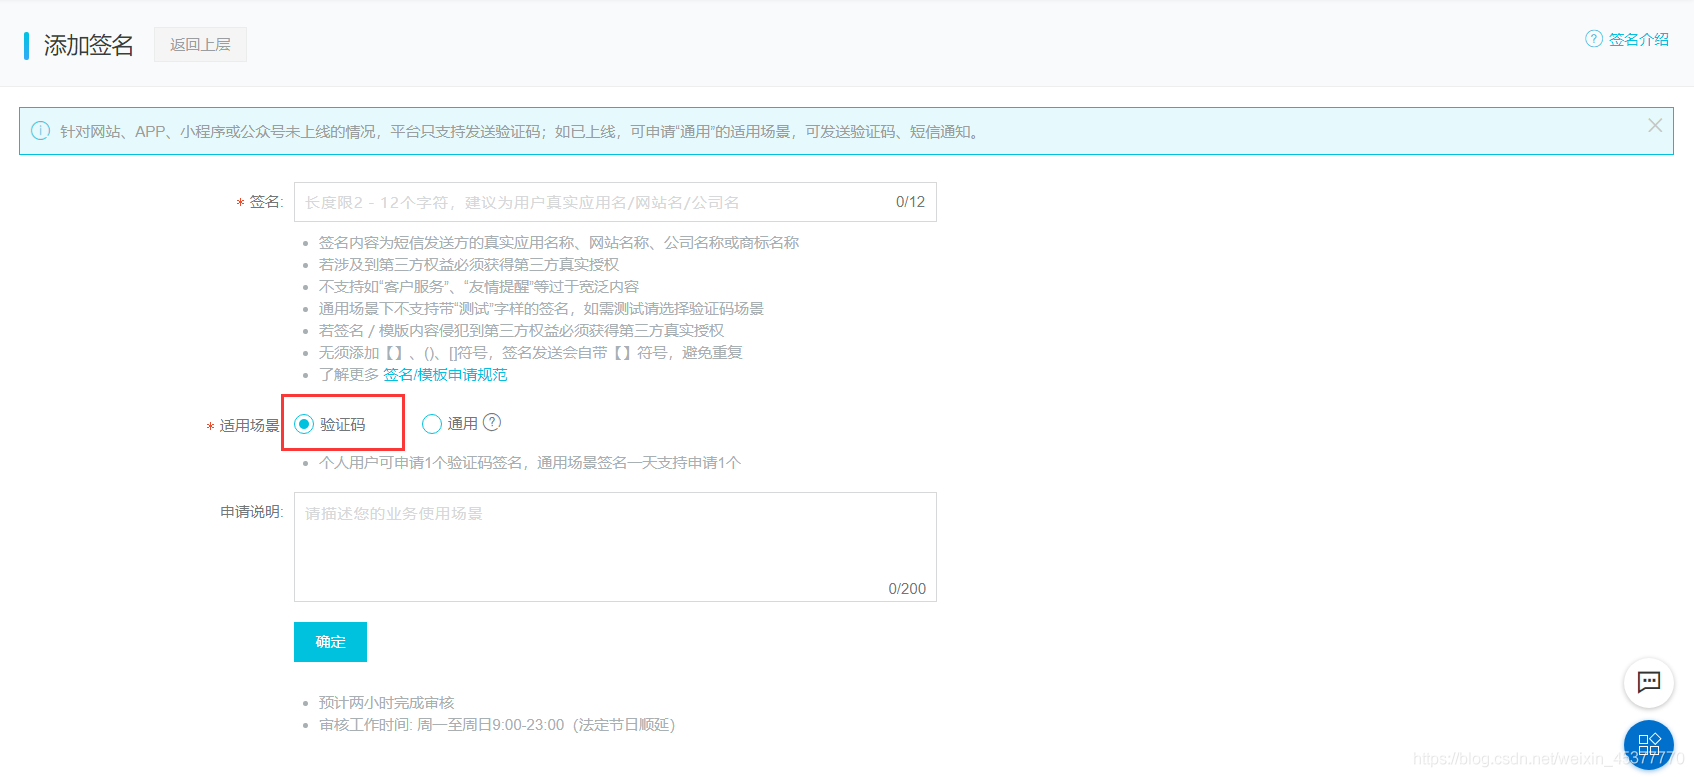
填写签名信息
签名不可以使用人名(否则过不了审核),申请说明就写:用于公司的登陆及注册业务,就可以了
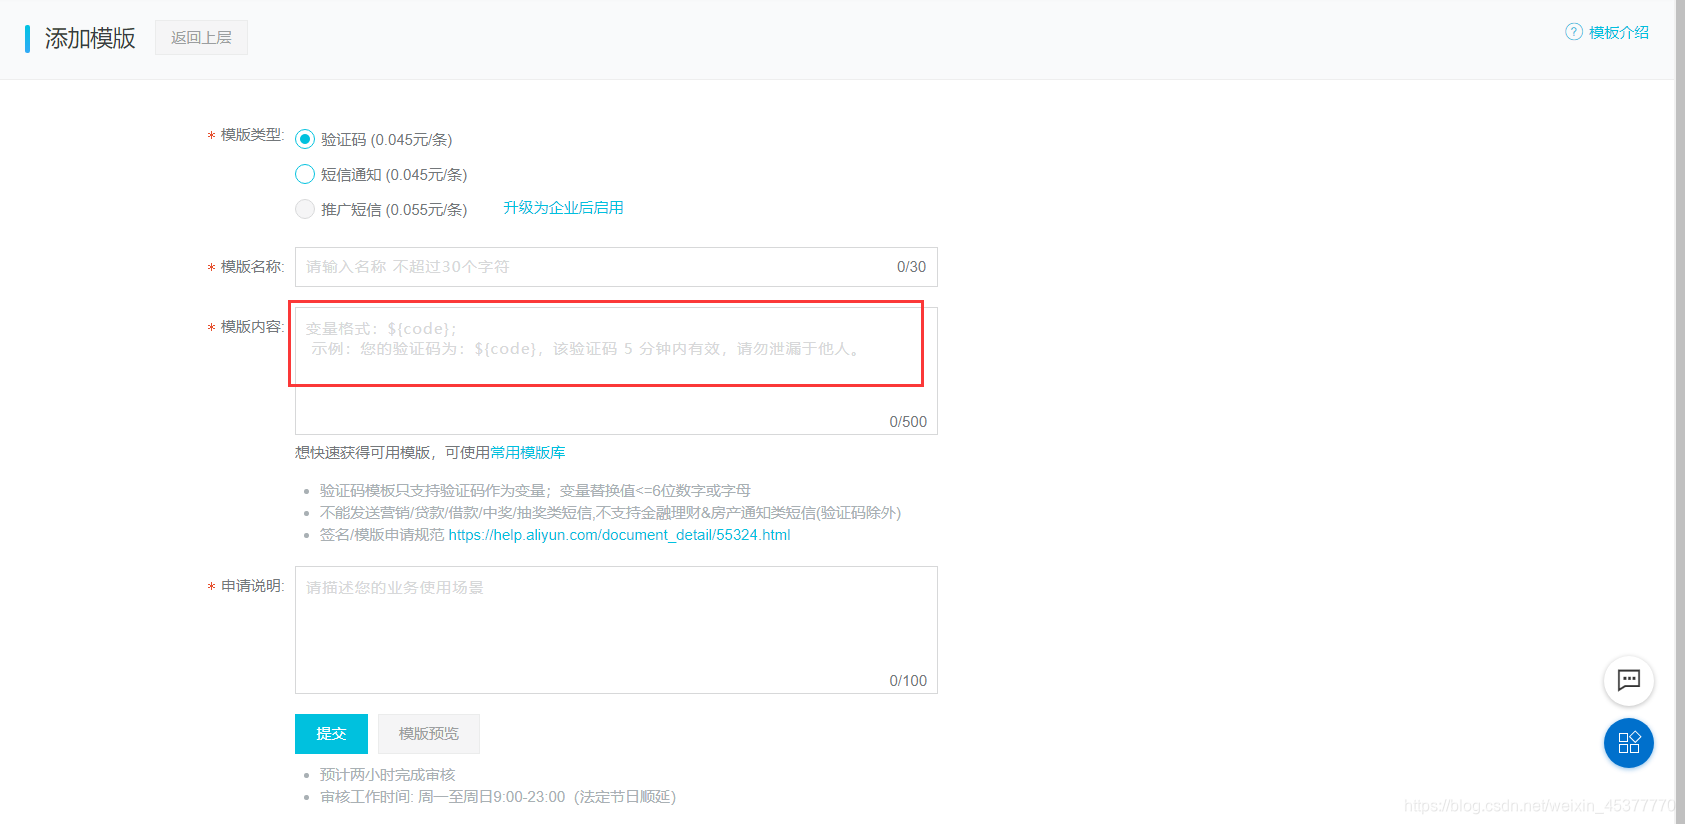
添加模板
模板内容:您的验证码为:${code},该验证码5分钟内有效,请勿泄露于他人。
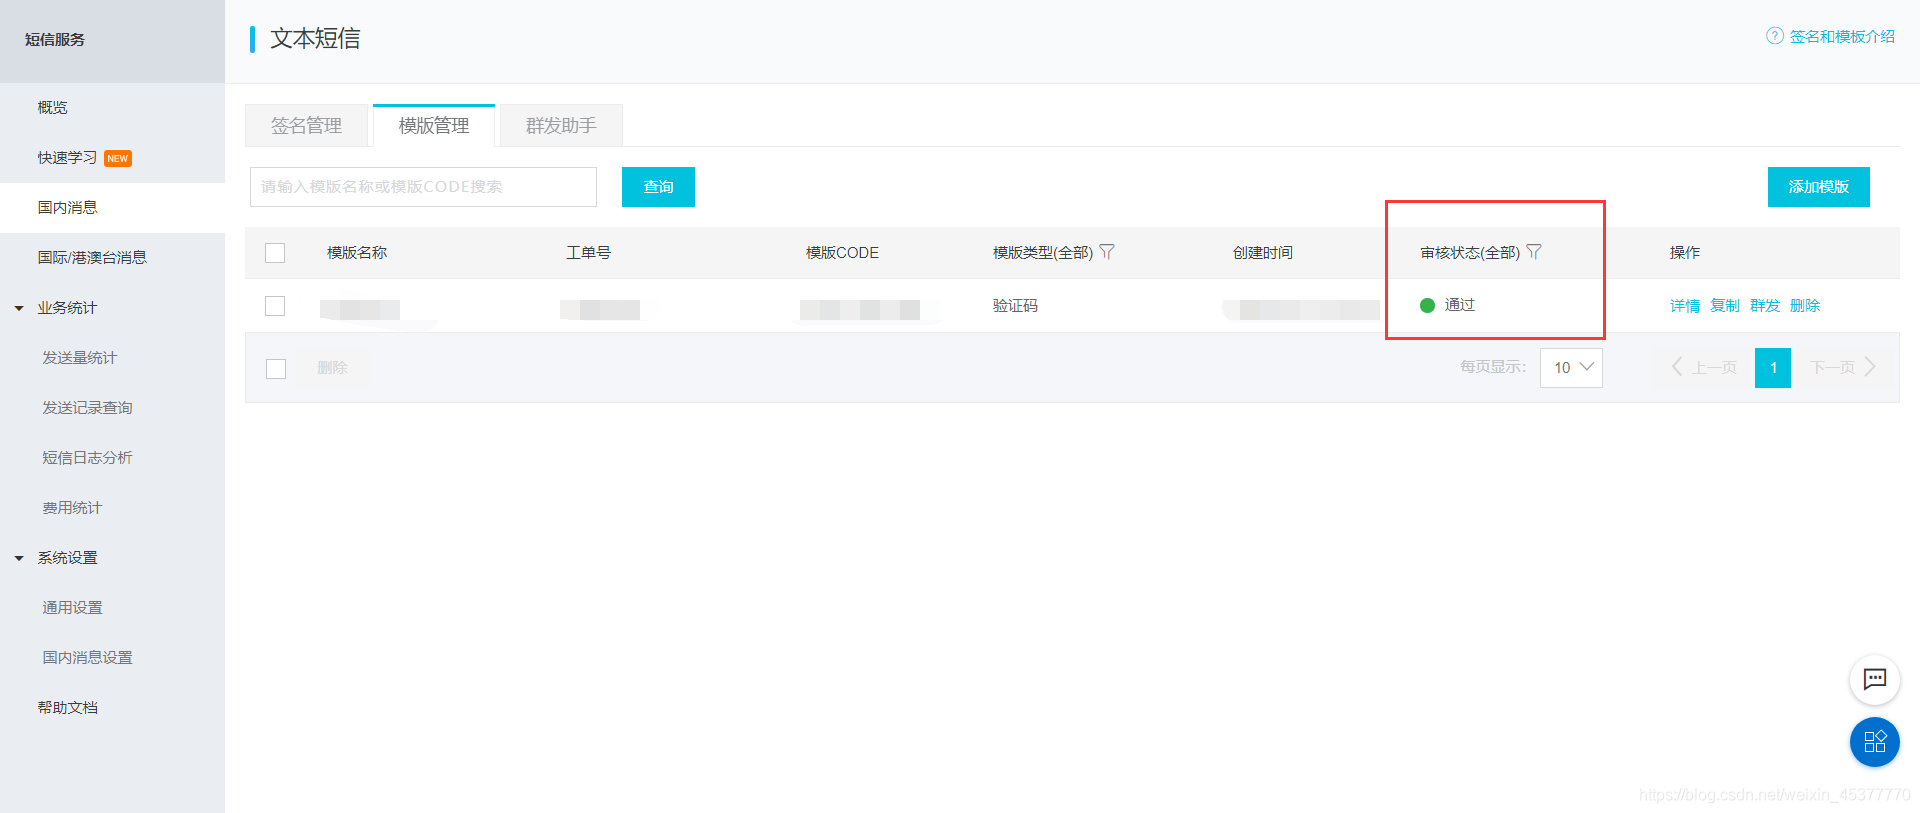
短信签名和短信模板这里都必须审核通过之后才能使用
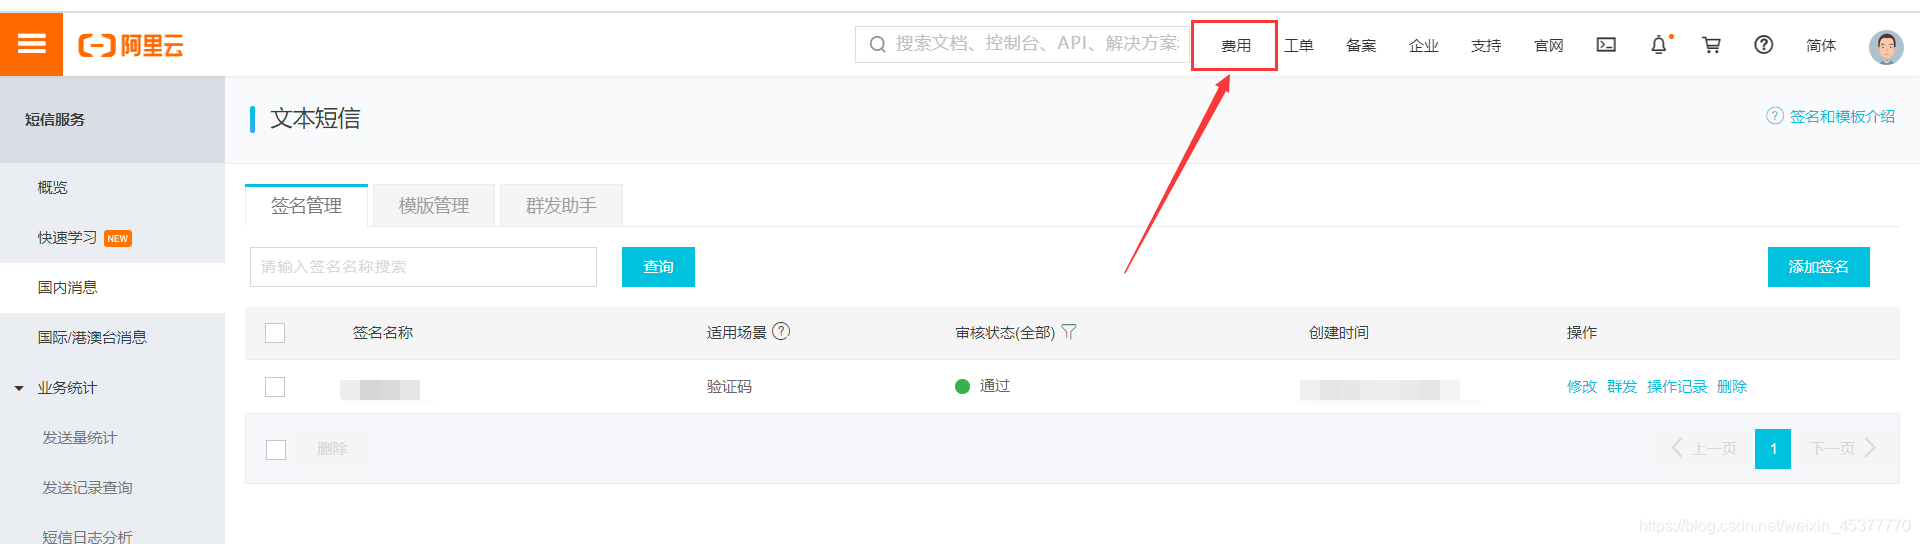
点击进入费用
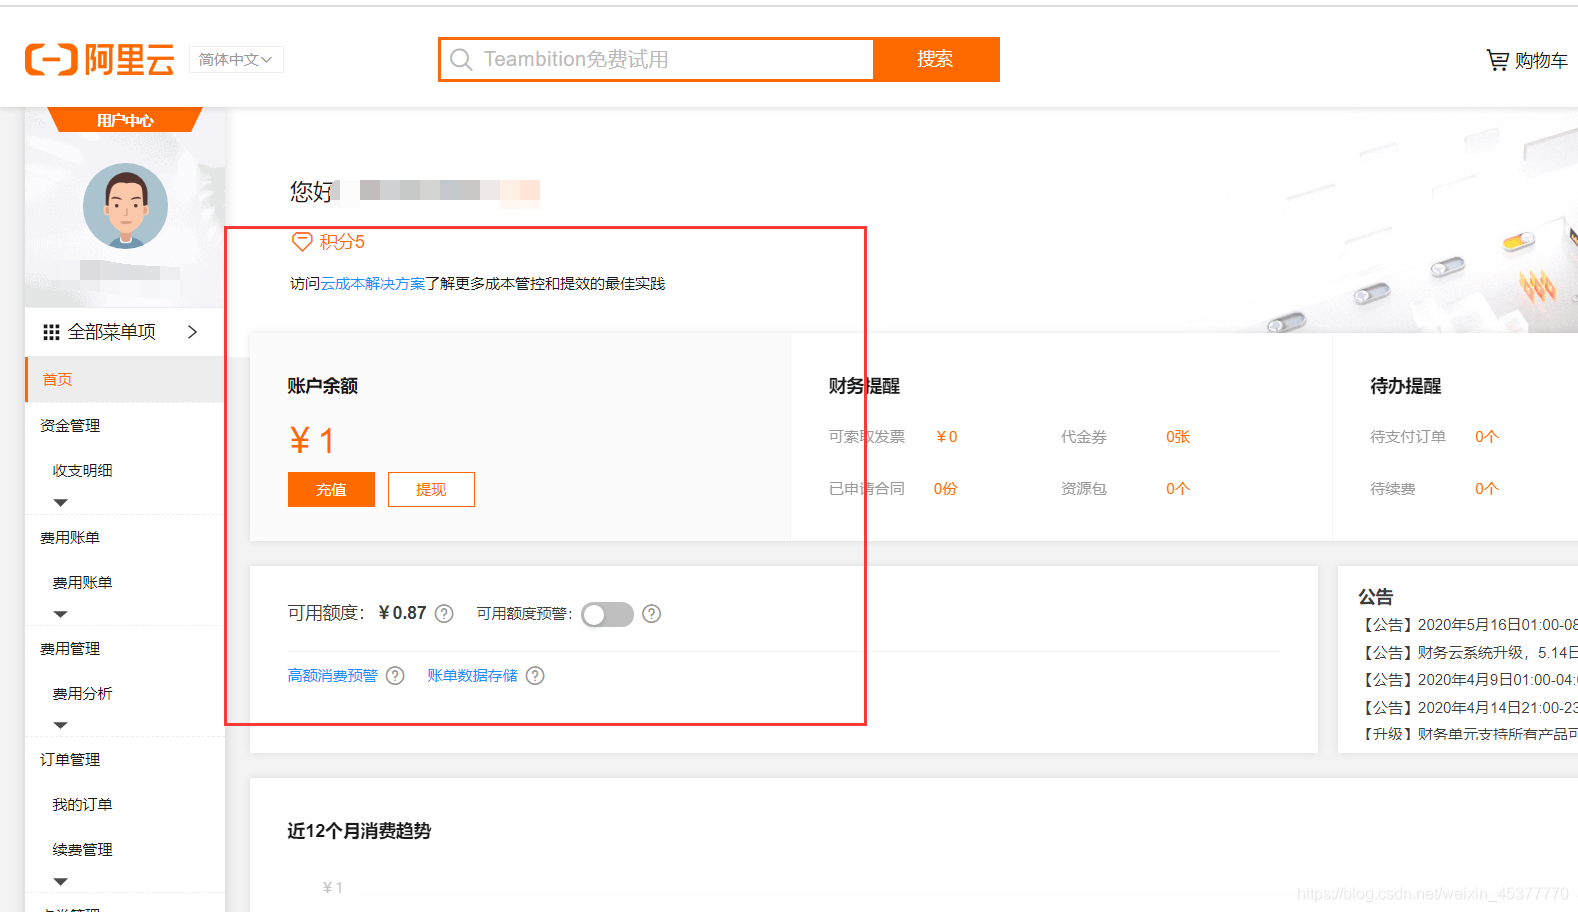
这里我们用于测试,充值个1块钱就可以了
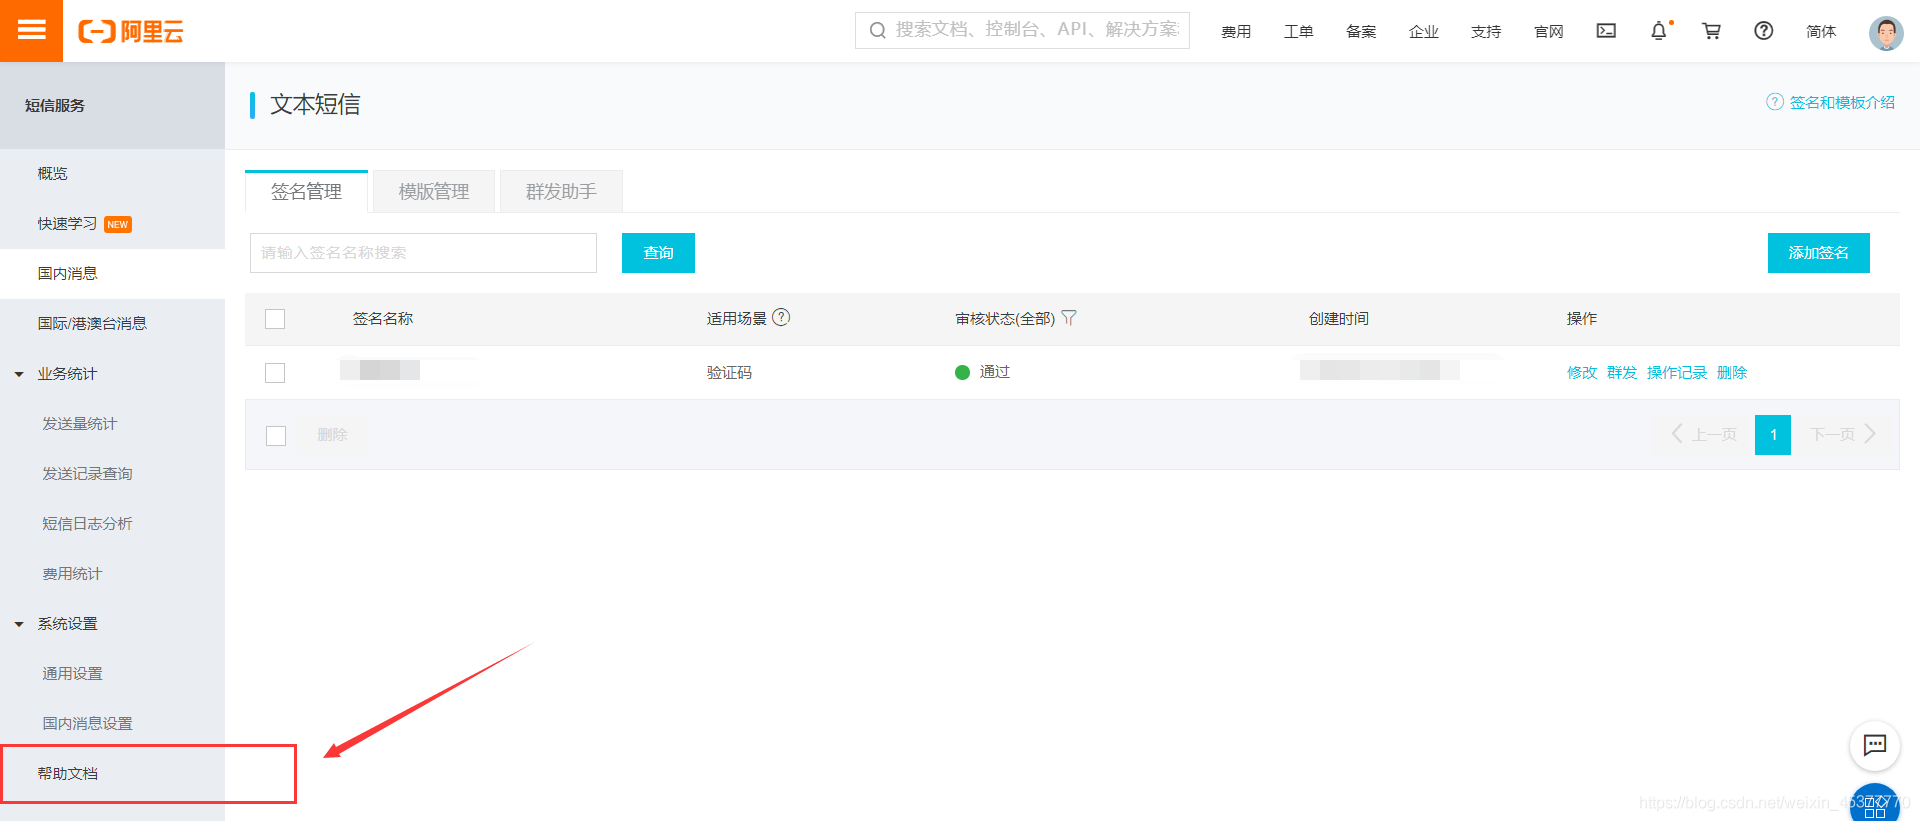
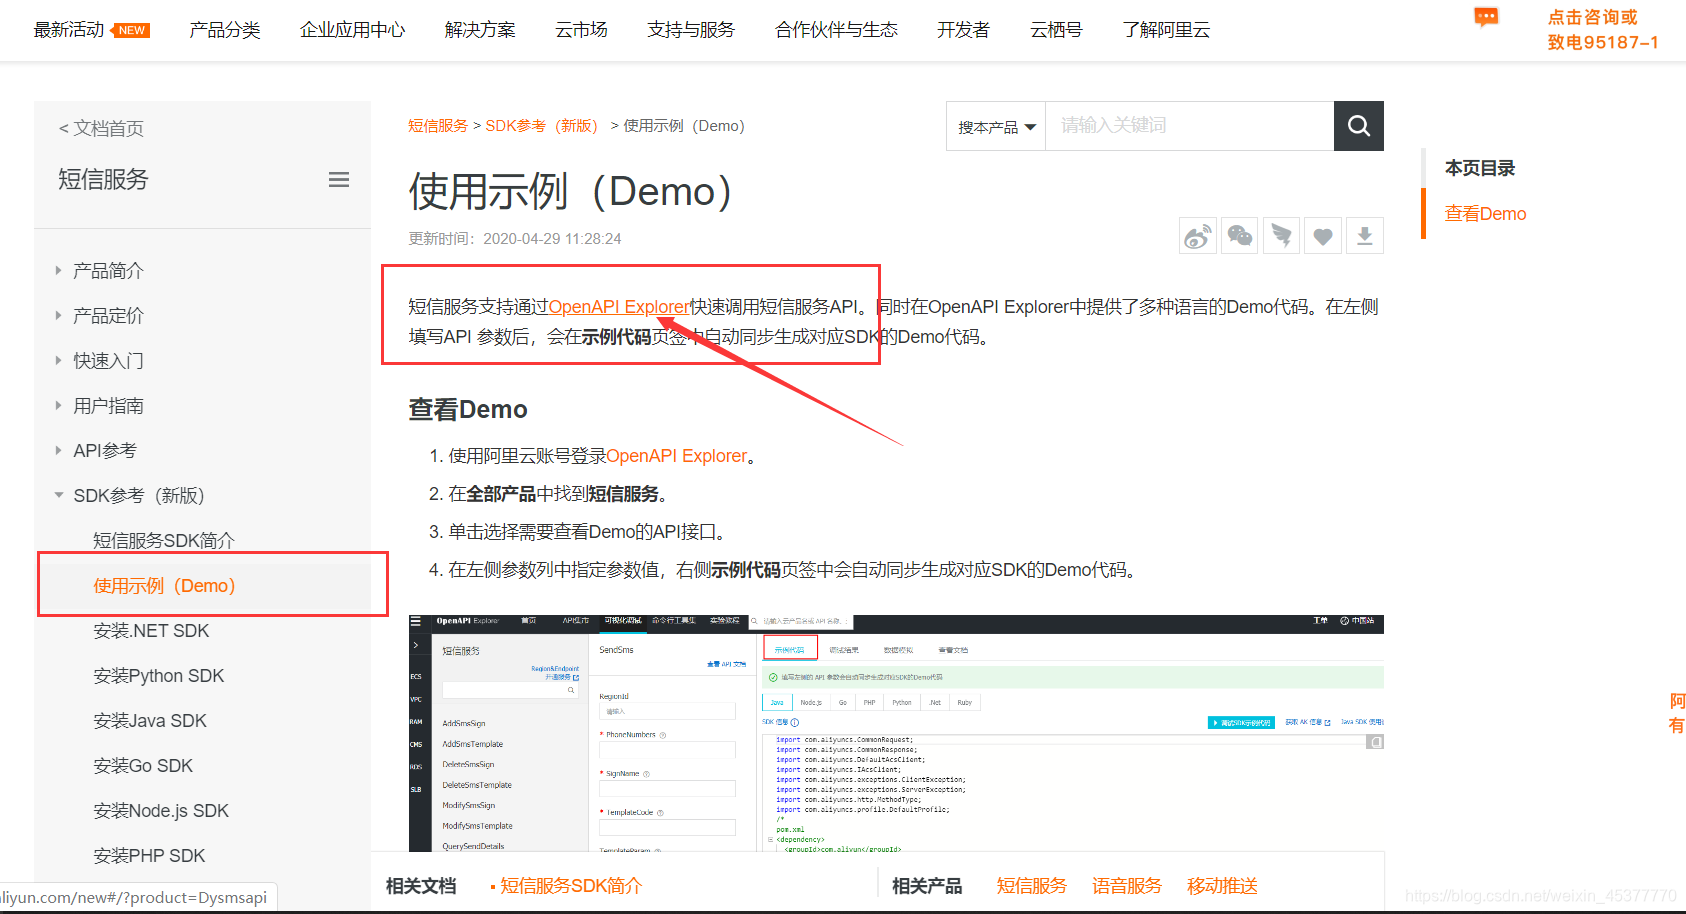
返回之前的页面,查看帮助文档
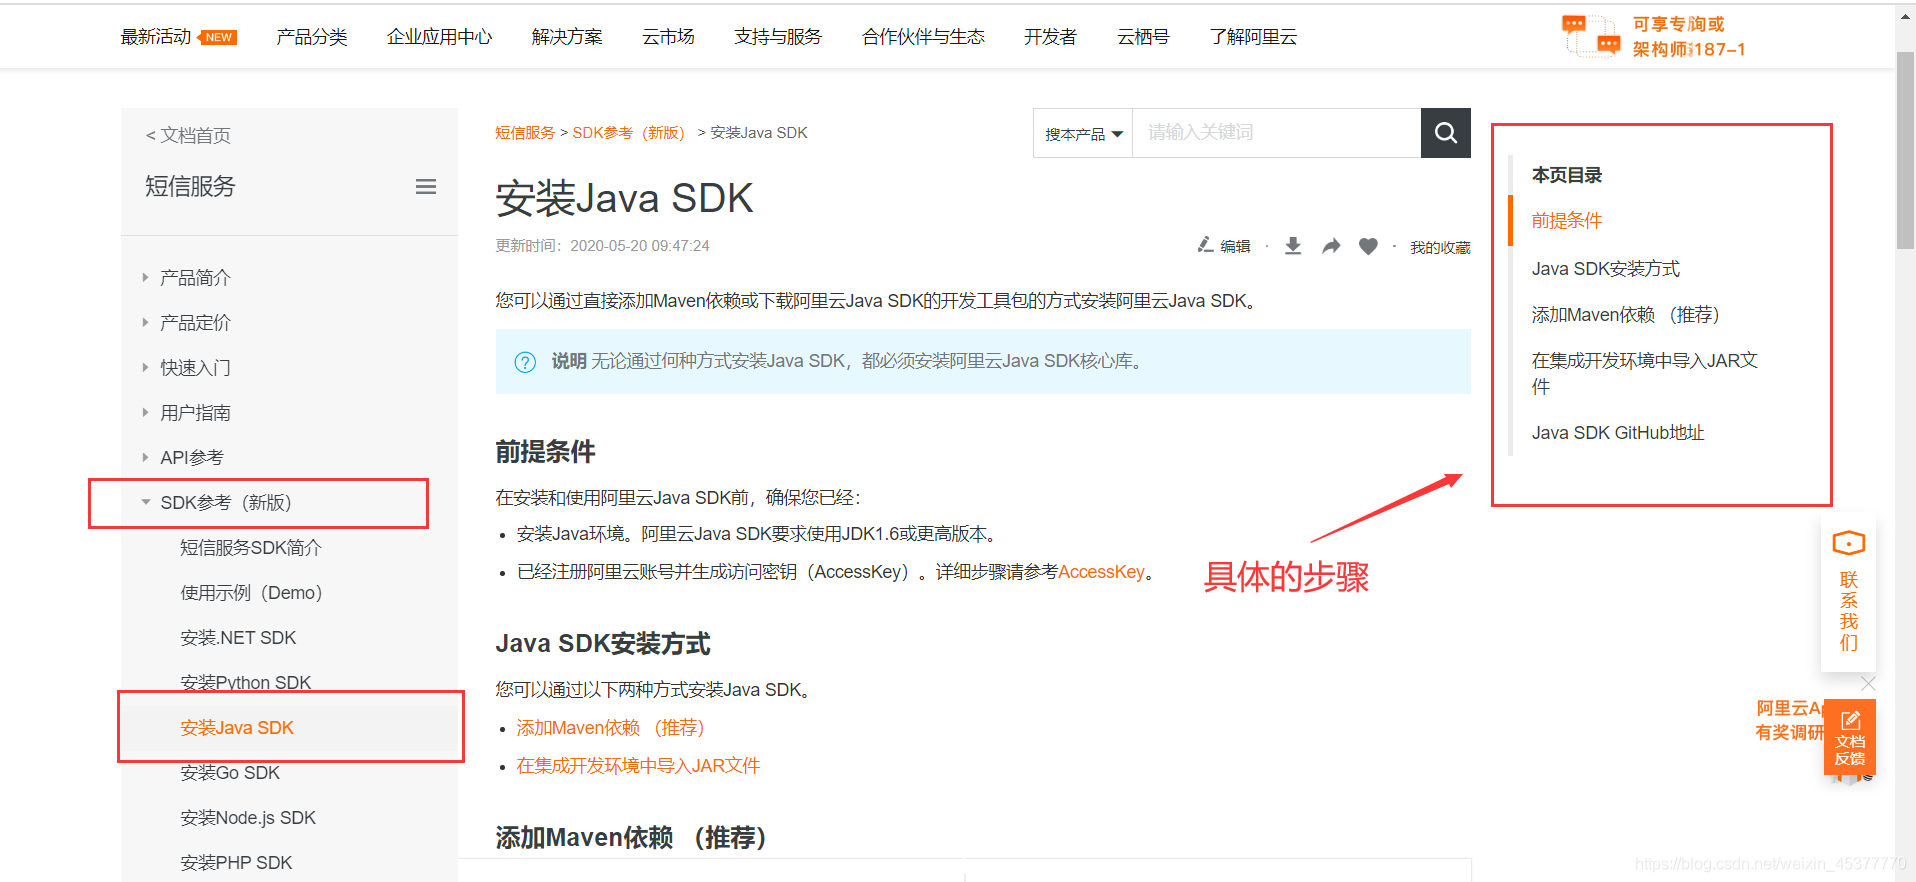
使用Java发送验证码,当然是选Java SDK啦,右侧是目录(可以进行参考)
到这里关于阿里云的就差不多了
4.开发工具进行代码部分(这里使用IDEA)
在Maven工程中导入两个依赖
1
2
3
4
5
6
7
8
9
10
11
12
13
| <!--短信验证码(阿里云)-->
<dependency>
<groupId>com.aliyun</groupId>
<artifactId>aliyun-java-sdk-core</artifactId>
<version>4.1.0</version>
</dependency>
<!--JSON-->
<dependency>
<groupId>com.alibaba</groupId>
<artifactId>fastjson</artifactId>
<version>1.2.45</version>
</dependency>
|
进入查看示例源码
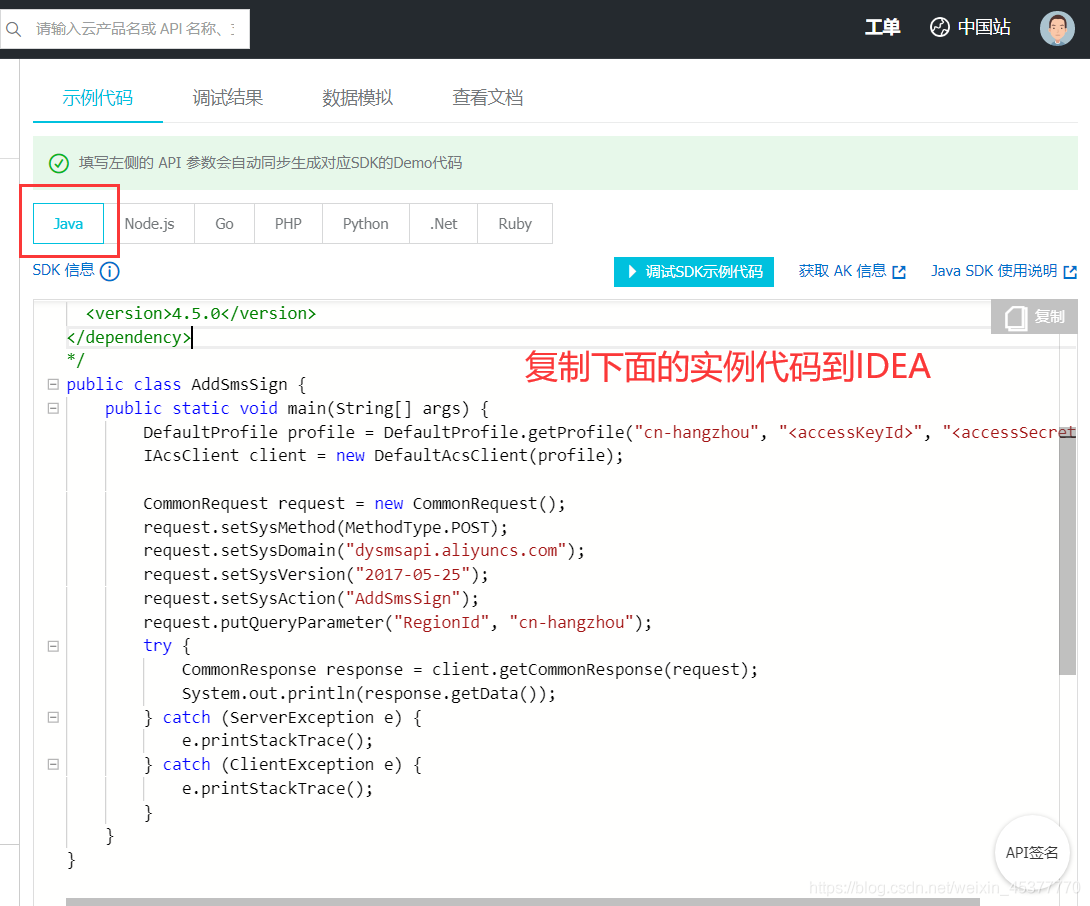
在项目中新建一个测试类(或者main方法直接运行)
下面需要修改的地方都写了标识1-5,一共有5处需要修改,其他的都不需要修改
注:AccessKey ID和AccessKey Secre就是前面创建用户所保存的信息
1
2
3
4
5
6
7
8
9
10
11
12
13
14
15
16
17
18
19
20
21
22
23
24
25
26
27
28
29
30
| @Test
void contextLoads() {
DefaultProfile profile = DefaultProfile.getProfile("cn-hangzhou",
"1这里填入阿里云用户的AccessKey ID", "2这里填入阿里云用户的AccessKey Secre");
IAcsClient client = new DefaultAcsClient(profile);
CommonRequest request = new CommonRequest();
request.setMethod(MethodType.POST);
request.setDomain("dysmsapi.aliyuncs.com");
request.setVersion("2017-05-25");
request.setAction("SendSms");
request.putQueryParameter("PhoneNumbers","3目标手机号" );
request.putQueryParameter("SignName", "4短信签名");
request.putQueryParameter("TemplateCode", "5短信模版CODE");
String code = UUID.randomUUID().toString().substring(0,4);
Map<String,Object> map = new HashMap<>();
map.put("code",code);
request.putQueryParameter("TemplateParam", JSONObject.toJSONString(map));
try {
CommonResponse response = client.getCommonResponse(request);
System.out.println(response.getData());
} catch (ServerException e) {
e.printStackTrace();
} catch (ClientException e) {
e.printStackTrace();
}
}
|